We've added a small but meaningful safeguard to DatoCMS accounts: email verification. Before a handful of sensitive actions, we now make sure the email address on your account really belongs to you. It runs quietly in the background, and most of the time you won't even notice it.
When it kicks in
We only ask for a verified email before actions that affect other people or move projects between accounts:
Inviting someone to your organization
Transferring a project to another account or organization
Accepting a project that's being transferred to you
Joining a project or organization you've been invited to
How it works
When you sign up, we send a confirmation email. Click the link inside and you're verified for good.
If you reach one of these actions before you've verified, we'll pause and send that email for you automatically (or resend it, if it's been a while). Click the link, and we'll pick up right where you left off, with nothing to redo and nothing to start over. You'll only go through this once.
Dark mode is now available in your DatoCMS dashboard, too. Manage your account, projects, and billing in a theme that's easier on the eyes during long sessions.
Choose System, Light, or Dark from the menu under your avatar. Your preference is saved to your account, and the dashboard follows your OS setting until you pick a side.
The version history of a record now doubles as a publication timeline. Every version tells you not just when it was created, but the exact window it was actually published (and a green dot shows you which version is currently published).
Before this, the version history panel only showed when a version was saved and by whom. This change makes it simpler to understand when they were published.
Asset history
What's new
Open any record's history, and each version now carries its publication info under the timestamp:
Live since X — this version is published and currently live, with no end in sight.
Live from X → Y — this version was public for a stretch, then superseded.
Live on X, HH:MM → HH:MM — published and replaced the same day, down to the minute.
A redesigned visual indication ties it all together:
A green "live" dot marks the version that's currently published.
A muted dot marks versions that were live at some point in the past.
Each entry now credits the editor who made the change with a "Edited by …" so the timeline reads as a full audit trail at a glance.
Under the hood
The publication ranges are backed by new metadata on item versions — published_from and published_until — exposed through the Content Management API. The dashboard reads them via @datocms/cma-client 5.5.1 or higher.
This is a forward-looking history: we don't retroactively reconstruct intervals for versions that were already live when the feature shipped.
If you publish a version, unpublish, then re-publish that same version with no edit in between, the new published_from overwrites the previous one and published_until is cleared. The version reflects its latest interval rather than a full multi-interval log. In practice most workflows save an intermediate version before re-publishing, which produces a fresh row and preserves the earlier one.
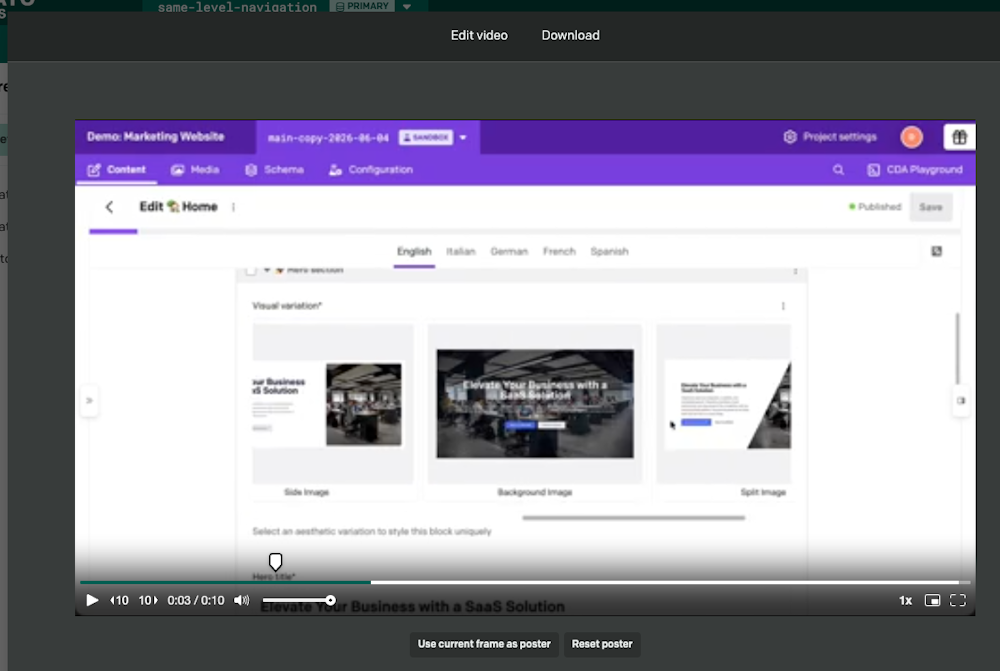
Heavy on video usage and want to set a specific frame as the thumbnail from within the CMS itself? Now you can.
TL;DR: You can now choose the poster frame for any video right from the asset editor. Choose the perfect moment, pin it, and that frame becomes the video's thumbnail everywhere. No re-encoding, no external tools, no guessing which frame the player will grab.
How it works
Open a video asset and you'll find a poster picker built right into the player:
Head to the frame you want. A pin on the seek bar marks the current poster frame, aligned precisely to the player's timeline so what you see is what you get.
Hover the pin and a large, high-resolution thumbnail shows exactly how that frame will look as the poster, sized to fit whether you're in the media area, a modal, or the sidebar.
Select Use current frame as poster and your choice saves instantly.
Under the hood
The chosen frame is stored as poster_time (in seconds) inside the upload's default_field_metadata, the direct video analogue of focal_point. Like the focal point, it's a non-localized, per-asset default, so it travels with the asset and is available through the Content Management API for your front end to consume when rendering posters.
Thumbnail selection is precise to the hundredth of a second. The time readout shows m:ss.cs, so you can land on an exact frame rather than a rough area — 1:04.27, not "somewhere around 1:04".
Getting correctly-sized responsive images used to mean adding a sizes prop that mirrored your CSS layout, and keeping it in sync as the design changed. No more. Update any DatoCMS framework SDK and you can stop dealing with that.
Responsive images were a burden
The whole point of a responsive srcset is to let the browser pick the smallest image that still looks sharp. But to choose, it has to know how wide the image will actually render, and it needs that number up front, while parsing the HTML, before any CSS or layout exists.
It can't measure the element itself, so the job fell on you: hand-write a sizes value mirroring your CSS layout, and keep it in sync every time the design changed.
Hello, sizes=auto!
Browsers now have a proper fix: sizes="auto". On a lazily-loaded image, it tells the browser to use the element's real, laid-out width when choosing a srcset candidate. Because a lazy image is fetched after layout, the box is already measured by the time the request goes out, so the choice is exact, not estimated.
When you don't pass an explicit sizes prop, all four framework SDKs: react-datocms, vue-datocms, @datocms/svelte, and @datocms/astro, now emit sizes="auto" (with 100vw kept as a fallback) together with loading="lazy":
Upgrade the package and your existing <Image> components start requesting right-sized files on their own.
Under the hood
If you pass an explicit sizes prop, or your responsiveImage GraphQL query already returns a sizes value, we never override it.
Images marked with the priority prop load eagerly, and sizes="auto" requires loading="lazy", so they keep their current behavior.
Every SDK component already sets aspect-ratio + width: 100% + a max-width, which is exactly what auto needs to resolve to the correct box, so the default styling already does the right thing.
Browser support and graceful fallback
sizes="auto" is supported in Chrome and Edge 126+, Opera, Samsung Internet, and Firefox 150+. Safari doesn't support it yet.
That's why we emit sizes="auto, 100vw" rather than a bare auto: browsers that don't understand auto skip it and fall back to 100vw — the safe default that's been the de-facto, so there's no regression anywhere.
The focal point of an image marks where its subject is: the face, the product, the thing that should stay in frame. It matters when you ask GraphQL for a cropped version. Pass imgixParams like w: 200, h: 200, fit: crop, and if a focal point is set, DatoCMS automatically adds fp-x and fp-y so the crop is built around the subject rather than the dead center of the image. You set it by clicking on the image in the upload's preview.
When we first shipped this, we let you set a different focal point for each locale, behind an interface that did almost everything in its power to hide that fact. The control sat on the left, over the image. Which locale you were actually editing was decided somewhere else entirely: a language selector tucked into the Default metadata panel on the right, with nothing visibly connecting the two. The only hint was a small Focal point (English) label that changed quietly when you switched languages on the far side of the screen.
We were wrong, about both the idea and the interface. A focal point describes where the subject physically sits in the pixels, and a face doesn't move when you translate the page into German. And because the localizability was effectively invisible, almost nobody used it. Across more than 20 million multi-locale uploads, 92% had a focal point set in the primary locale only. That was less a deliberate choice than the natural result of an interface that never let on there was anything else to set. Of the few who did discover the per-locale behaviour, 95% simply repeated the same coordinates across all locales. Just 0.019% ever set genuinely different focal points across locales, and even then, the differences were almost always too small to see.
Worse, making it localizable didn't only add friction. It quietly broke cropping. Because nearly everyone set the point in a single language, focal-point cropping worked in that language and silently fell back to a plain centre crop everywhere else. The subject you carefully framed in English could end up off-centre, or cropped out entirely, in Italian, with nothing in the editor to warn you.
So we've fixed it.
What changes for everyone today
Every asset now has a single focal point: one value, shared across all locales. This isn't an opt-in. It applies to every project right away.
Cropping is now consistent across languages. Set the focal point once, and it applies in every locale. If you were only setting it in your primary locale (as most people were), your crops everywhere else just improved on their own, with nothing for you to do.
The editor is simpler, too. The focal point is no longer tied to the language selector or to the Default metadata form. It's now an always-visible control on the upload's preview. Click anywhere on the image to aim it, and the new position saves instantly in the background: no language to pick, no Save button to hunt for. (That also retires the old gotcha where the Save button hid inside a collapsible panel and was easy to lose after you'd moved the point.)
On the CDA, the response shape doesn't change. focalPoint is still a single value per query. It just now resolves to that one shared value in every locale, instead of vanishing in the locales where no one had set it.
In the rare case where you'd deliberately set different focal points per locale, the value from your primary locale is the one we keep. If you need the old per-locale values restored, contact Support.
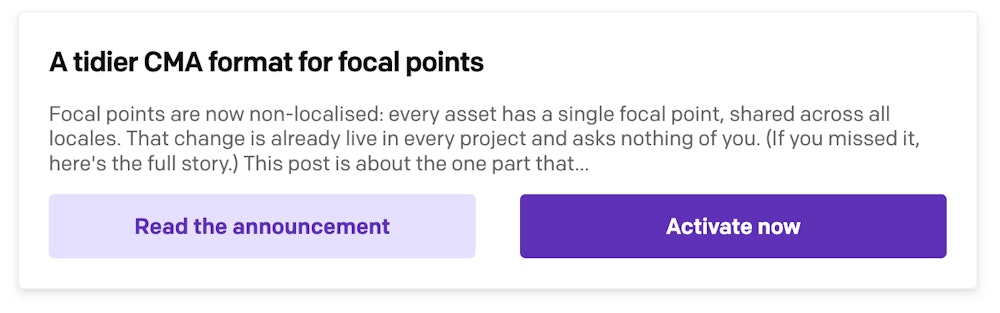
If you read or write focal points through the Content Management API, there's a short follow-up for you: an optional, tidier CMA format. Read it here.
Focal points are now non-localized: every asset has a single focal point, shared across all locales. That change is already live in every project and asks nothing of you. (If you missed it, here's the full story.)
This post is about the one part that is opt-in: the shape of default_field_metadata in the Content Management API.
By default, nothing changes for your integrations. The CMA keeps returning and accepting the existing locale-keyed shape, so your current code keeps working untouched. The only difference is that the focal point is now the same value in every locale entry: the one real value, replicated for backward compatibility.
When you want an API that reflects the new reality, opt in. With the flag on, default_field_metadata switches to a field-keyed shape: alt, title, and custom_data remain locale-keyed, but focal_point appears once at the top level. The legacy locale-keyed shape is then no longer accepted on write, so update any code that writes default_field_metadata to the new shape before you activate it.
Before opt-in migration: Current locale-keyed shape
1
{
2
"data":{
3
"id":"12345678",
4
"type":"upload",
5
"attributes":{
6
"default_field_metadata":{// Locales first, then fields
7
"en":{// Primary locale
8
"alt":"English alt text",
9
"title":"English title",
10
"custom_data":{
11
"english_custom_data":"hi"
12
},
13
"focal_point":{
14
"x":0.12,
15
"y":0.34
16
}
17
},
18
"it":{
19
"alt":"Italian alt text",
20
"title":"Italian title",
21
"custom_data":{
22
"italian_custom_data":"ciao"
23
},
24
"focal_point":{// This is silently ignored now; overridden by primary
25
"x":0.56,
26
"y":0.78
27
}
28
}
29
}
30
}
31
}
32
}
After opt-in migration: New field-keyed shape
1
{
2
"data":{
3
"id":"12345678",
4
"type":"upload",
5
"attributes":{
6
"default_field_metadata":{// Fields first, then locales
7
"alt":{
8
"en":"English alt text",
9
"it":"Italian alt text"
10
},
11
"title":{
12
"en":"English title",
13
"it":"Italian title"
14
},
15
"custom_data":{
16
"en":{
17
"english_custom_data":"hi"
18
},
19
"it":{
20
"italian_custom_data":"ciao"
21
}
22
},
23
"focal_point":{// No longer locale-specific
24
"x":0.12,
25
"y":0.34
26
}
27
}
28
}
29
}
30
}
Activating the opt-in
Existing Projects (created before 2026-06-11)
In an environment's Configuration screen (not Project settings), under Available updates, you should see a new opt-in update:
It's set per environment, and it's a one-way switch: once non_localized_focal_points is on, you can't turn it back off. If you have integrations that write default_field_metadata through the CMA, we strongly recommend enabling it first in a separate Sandbox environment, updating and verifying your integrations there, and only then activating it on your primary environment.
If you don't write this data programmatically, there's nothing to do here. The default shape continues to work, and the focal point is already consolidated across all assets.
New projects (created after 2026-06-11)
The opt-in is automatically enabled for new projects and will use the new field-keyed format.
JS clients' support for the new shape is available from version 5.5.0.
You and your editors can now use DatoCMS in dark mode. It follows your OS preference automatically: switch your system to dark and DatoCMS switches with you, no configuration needed.
Not a fan of that? Go manual. Each team member sets their own preference independently, synced to their account across all devices, with the option to override their system setting anytime.
Dark mode covers every single view: Schema Builder, Record Editor, Media Library, Settings pages, all of it. Contrast ratios were checked for WCAG compliance so it's built for long editing sessions, not just a cosmetic fresh coat of paint.
Upgrading Plugins
If you maintain a plugin, this part's for you — otherwise you can skip it.
In dark mode, plugins built on datocms-plugin-sdk 2.1.5 or earlier render inside a white frame. They keep working as normal; the frame is just a safe fallback so nothing breaks until you update.
To make a plugin fully dark-mode compatible, upgrade to the latest SDK version and follow this upgrade guide. The migration is mechanical, so the guide includes a ready-made prompt you can hand to an AI agent to do the whole thing for you.
The DatoCMS MCP server is now hosted remotely! Log in once via OAuth and work across every project you have access to — in a single session, without restarting the server or swapping environment variables.
No npm install, no API token management! The server is always up to date, always available, and always secure.
This also means the MCP server is no longer a developer-only tool. With the local version, setting it up required terminal skills, npm, and manual token configuration — effectively limiting it to technical users. The remote server removes all of that: content editors, marketers, and anyone with a DatoCMS account can now use AI assistants to interact with their projects directly.
Scoped OAuth authentication: No more explicit API tokens! During the authorization step, you can limit access to only the projects you choose. Every action is tied to your personal identity, giving teams clear visibility over who made which changes, when using an AI assistant.
Multi-project support: The agent can discover which projects you have access to, and switch between them within the same conversation. You can also paste a DatoCMS editor URL into a prompt and the server resolves the right project automatically.
Sandboxed script execution: Scripts execute in an isolated remote sandbox (not on your machine), plus your DatoCMS credentials are kept safe and cannot be read by the agent.
Separate tools for safe/unsafe actions: You can configure your agent to ie. always execute safe (read-only) actions, and manually confirm writes/deletions.
Migration
Setup is simpler than ever! Follow the installation guide for your specific AI client — most of the times, this is the snippet that works:
{
"mcpServers":{
"datocms":{
"type":"http",
"url":"https://mcp.datocms.com"
}
}
}
Breaking changes
The old local MCP server has been deprecated in favor of the new, improved remote MCP server. The Github repository is archived and no longer maintained.
DatoCMS Agent Skills are a set of markdown-based playbooks for AI coding agents. They give your agent the context it needs help you develop your projects correctly with DatoCMS: the right patterns, the right conventions, loaded on demand based on what you're working on.
Plugindevelopment — create a brand-new plugin from scratch with the Vite/React structure, picking the initial surfaces (field extensions, config screens, sidebars, pages, asset sources).