Next.js AB testing
How To Perform A/B Testing in Next.js
Crafting a successful marketing campaign or building an engaging user experience is challenging, and finding the most effective approach takes time. After all, it is unlikely that a project will meet all its goals in the first shot. This is why several techniques have been developed to test different ideas and approaches simultaneously, with the goal of collecting data to determine what the best solution is. This is what Next.js A/B testing is about, and here you will learn how to apply this technique aimed at testing two versions of a web page against each other to understand which one is better.
First, let’s learn what A/B testing is, how it works, and why you should use it. Then, let’s focus onto implement an A/B testing strategy on landing pages in Next.js.
Want to start right away?
Create infinite landing pages for your A/B tests, using DatoCMS landing page template! Read more on our article about our landing page builder

What Is A/B Testing?
A/B testing, also known as split-run testing or bucket testing, refers to a method of comparing two or more versions of a web page, application, or user interfaces against each other to figure out which one performs better. In other terms, A/B tests are randomized experiments where two or more variants of a page are shown to different visitors at the same time to gather data. Then, this data is analyzed statistically to determine which version performs better for a given conversion goal or in terms of certain business metrics.

A/B testing should be applied to every aspect of a website or application that plays a key role in terms of conversion rate. This is because optimizing these aspects allows you to take your website to its maximum potential. These elements include anything that may influence the behavior of your visitors and lead them to your marketing goals. Examples of these aspects are as headlines, design, and layout, colors, images, and copy.
Keep in mind that you should not overengineer your A/B tests. So, keep them simple and change only a limited amount of variables at a time. On the other hand, consider that you can also run several A/B tests at the same time, especially when your website involves many pages.
Now, let’s understand how A/B tests work in practice.
How Does A/B Testing Work?
A/B testing is simple. Let’s assume you wanted to apply it to a landing page of yours. All you have to do to perform an A/B test is to take your current landing page and change it to produce a second version of it. The change introduced in the new landing page might involve the layout, the order of the components, the colors, a button, some headlines, or other elements. What is important is to avoid changing too many things at once, especially if the landing page is already performing well. In fact, the more you change, the more difficult it becomes to understand the results of the experiment.
Then, a percentage of your traffic will be shown the original version of your landing page, while the remaining part will be shown its modified version. Hoe you define these percentages can depend on several factors, but you can also opt for a simplified 50%/50% approach.
As users visit the two or more variants of your landing page that are part of the experiment, various data is collected. This is then used to produce metrics, which you can measure and analyze with statistical approaches to finally determine if the change had a positive, negative, or neutral effect on the visitors’ experience.
Why Do A/B Testing?
There are several reasons to perform A/B testing, but let’s focus on the 3 most important ones:
It helps you achieve a better conversion rate: bringing traffic to your website is not easy and this is why you should implement approaches to achieve the highest conversion rate possible, and this is precisely what A/B testing is about.
It provides you with results backed by science: an A/B test involves gathering, analyzing, and studying a lot of data and metrics. So, A/B testing produces results that are backed by statistical analysis, not assumptions.
It removes the fear of updating a website: often, no one wants to modify a website. Especially, when it has been online in the same format for years. But A/B tests allow you to study the effect of changes and help you introduce low-risk modifications.
Implementing A/B Testing in Next.js
In a previous article, we learned how to build a landing page in Next.js. Now, let’s extend this demo application to introduce A/B testing logic.
Prerequisites
You can implement A/B testing without any additional dependencies. This means that the list of prerequisites remains the same as in the landing page demo application:
Follow this tutorial to learn how to build the following demo:

Performing A/B Testing in Next.js
Clone the GitHub repository that supports this article and test the A/B testing logic locally by launching the following commands:
git clone https://github.com/Tonel/how-to-perform-ab-testing-nextjscd how-to-perform-ab-testing-nextjsnpm inpm run devThen, visit the http://localhost:3000 page in your browser to see the landing page.
Otherwise, follow this step-by-step tutorial and learn how to implement A/B testing in Next.js.
1. Initializing a Next.js Project
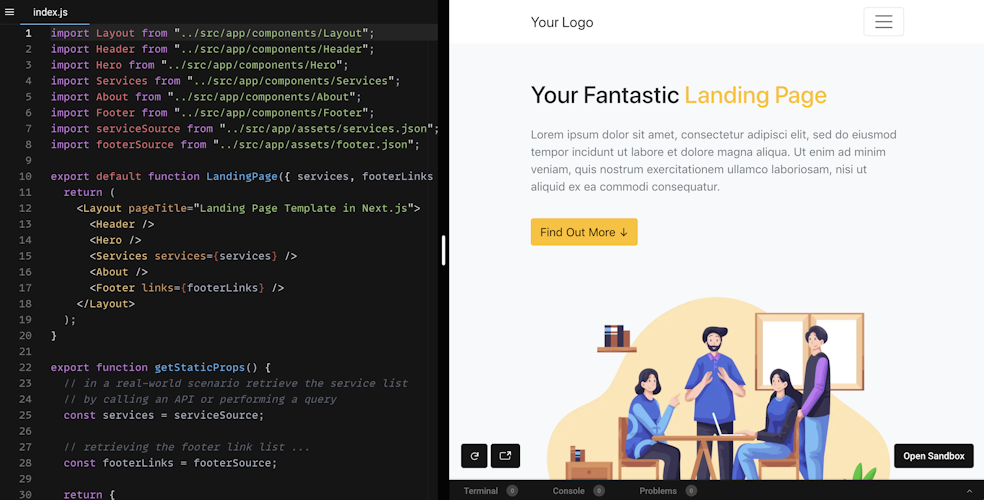
The landing page template consists of a header, a hero, a CTA, an about section, and a footer. But to perform an A/B test, you need at least two landing pages!. So, the first thing to do is to define landing page components:
LandingPage1
import React from "react"import Layout from "./Layout"import Header from "./Header"import Hero1 from "./Hero1"import About from "./About"import Footer from "./Footer"import Services from "./Services"
export default function LandingPage1({ services, footerLinks }) { return ( <Layout pageTitle="Landing Page Template 1 in Next.js"> <Header /> <Hero1 /> <Services services={services} /> <About /> <Footer links={footerLinks} /> </Layout> )}LandingPage2
import React from "react"import Layout from "./Layout"import Header from "./Header"import Hero2 from "./Hero2"import About from "./About"import Footer from "./Footer"import Services from "./Services"
export default function LandingPage2({ services, footerLinks }) { return ( <Layout pageTitle="Landing Page Template 2 in Next.js" className={"landing-page-2"}> <Header /> <Hero2 /> <Services services={services} /> <About /> <Footer links={footerLinks} /> </Layout> )}As you can see, the main difference is that LandingPage2 has a custom className attribute. This will be used to style the new landing page differently when compared to LandingPage1, which represents the original landing page. Also, the two landing pages have two different hero components. In detail, this is what the two components look like:
Hero1
import React from "react"import { Container, Row, Col } from "react-bootstrap"import hero1 from "../assets/images/hero-1.png"import Link from "next/link"import Image from "next/image"
export default function Hero1() { return ( <section className="section position-relative bg-light hero"> <Container> <Row className="align-items-center"> <Col lg={6}> <div className="pr-lg-5"> <h1 className="mb-4 font-weight-normal line-height-1_4"> Your Fantastic <span className="text-warning font-weight-medium">Landing Page</span> </h1> <p className="text-muted mb-4 pb-2"> Lorem ipsum dolor sit amet, consectetur adipisci elit, sed do eiusmod tempor incidunt ut labore et dolore magna aliqua. Ut enim ad minim veniam, quis nostrum exercitationem ullamco laboriosam, nisi ut aliquid ex ea commodi consequatur. </p> <Link href="#services"> <a className="btn btn-warning"> Find Out More <span className="ml-2">↓</span> </a> </Link> </div> </Col> <Col lg={6}> <div className="mt-5 mt-lg-0"> <Image layout={"responsive"} src={hero1.src} width={1000} height={710} alt="" className="img-fluid mx-auto d-block" /> </div> </Col> </Row> </Container> </section> )}Hero2
import React from "react"import { Container, Row, Col } from "react-bootstrap"import hero2 from "../assets/images/hero-2.png"import Link from "next/link"import Image from "next/image"
export default function Hero2() { return ( <section className="section position-relative bg-warning hero"> <Container> <Row className="align-items-center"> <Col lg={6}> <div className="pr-lg-5"> <h1 className="mb-4 font-weight-normal line-height-1_4"> Your Terrific <span className="text-warning font-weight-medium">Landing Page 2</span> </h1> <p className="text-muted mb-4 pb-2"> Lorem ipsum dolor sit amet, consectetur adipisci elit, sed do eiusmod tempor incidunt ut labore et dolore magna aliqua. Ut enim ad minim veniam, quis nostrum exercitationem ullamco laboriosam, nisi ut aliquid ex ea commodi consequatur. </p> <Link href="#services"> <a className="btn btn-warning"> Learn More <span className="ml-2">↓</span> </a> </Link> </div> </Col> <Col lg={6}> <div className="mt-5 mt-lg-0"> <Image layout={"responsive"} src={hero2.src} width={1000} height={710} alt="" className="img-fluid mx-auto d-block" /> </div> </Col> </Row> </Container> </section> )}The main difference between these two components is the image used and the headline copy.
Now, you have two landing pages to switch between in an A/B test. Let’s learn how to do this.
2. Implementing the A/B Test Logic
The new index.js file representing the home of your website will now look like this:
export default function Home({ landingPageKey, services, footerLinks }) { let landingPageComponent = undefined
// determining the landing page // component based on landingPageKey switch (landingPageKey) { case "landing-page-1": landingPageComponent = <LandingPage1 services={services} footerLinks={footerLinks} /> break case "landing-page-2": landingPageComponent = <LandingPage2 services={services} footerLinks={footerLinks} /> break }
return ( <> <div className={"text-center bg-light"}> <div className={"bg-dark"} style={{ color: "white" }}>{`Current landing page: ${landingPageKey}`}</div> <div className={"pt-2 pb-2"}> <Link href="/" replace={true}> <a className="btn btn-secondary">Reload page</a> </Link> </div> </div> {landingPageComponent} </> )}
export function getStaticProps() { // retrieving the footer link list ... const footerLinks = footerSource
// a random number between 1 and 2 const landingPageIndex = Math.floor(Math.random() * 2) + 1 // generating the landing page key selector const landingPageKey = `landing-page-${landingPageIndex}`
let services = []
// displaying different services based on the // current landing page switch (landingPageIndex) { // in a real-world scenario retrieve the service list // by calling an API or performing a query case 1: services = serviceSource1 break case 2: services = serviceSource2 break }
return { props: { landingPageKey: landingPageKey, services: services, footerLinks: footerLinks, }, revalidate: 60, }}In the getStaticProps() function, Math.random()is used to randomly generate 1 or 2. This number is then employed to identify which landing page will be shown to the end-user. Notice that the selection logic can be much more complex and involve different weights and percentages.
Similarly, the service data required by the two landing page components is retrieved differently based on which number was drawn. For the sake of simplicity, the service data was hard-coded into two JSON files. But in a real-world scenario, you should retrieve it with an API call, for example by calling your headless CMS. That way, you could use just one same landing page component to perform your A/B test. All you would need to do would be to retrieve different data based on random selection logic as in the above example and then pass it to the landing page component.
3. Putting It All Together
Launch the A/B testing demo application with this command:
npm run devOpen http://localhost:3000 in your browser and click on the “Reload page” button at the top of the page to start playing with the demo application. You should randomly get one of the two landing pages.
Then, you could use Google Analytics, add different UTM (Urchin Tracking Module) parameters to your CTA links, or follow similar approaches to collect data from your landing pages and determine which one performs better.
Et voilà! You have just implemented an A/B test in Next.js!
How DatoCMS Can Support Your A/B Testing Strategy
A headless CMS is a content management system application that comes with no front-end and allows you to store, manage, and deliver content in one place. In detail, DatoCMS acts as a single source of truth, and it is the perfect tool for implementing a multi-site strategy. Unlike a traditional CMS, DatoCMS does not have a coupled front-end and enables you to manage all your data, content, and resources through APIs. This makes it the perfect headless CMS for managing content with Next.js.
When it comes to A/B testing, a headless CMS like DatoCMS can support you in several ways.
First, keep in mind that DatoCMS is also a landing page builder. This means that you can create the pages to switch between during the test with no effort.
Second, content is retrieved through APIs. So, if you want to change the content shown in a page randomly, you just need to implement random API selection logic.
Third, all the content is managed in one place. Consequently, analyzing the results of your tests becomes easier, especially when performing them on multiple pages or websites.
But keep in mind that those were just some examples. In fact, DatoCMS offers you many other features to support your marketing campaigns.
Learn more about DatoCMS as the best CMS for marketing.

Conclusion
In this article, we learned what A/B testing is, how you can perform A/B tests, and why you should take into account A/B testing if you want to optimize your website, application, or marketing campaign. Also, we learned how to perform A/B testing in Next.js on different landing pages. This is not difficult and involves just a few lines of code. On the other hand, if you want to take your A/B tests to the next level you need the support of some advanced tool, such as DatoCMS.
Thanks for reading! We hope that you found this article helpful. Feel free to reach out to us on Twitter with any questions, comments, or suggestions.
- Want to start right away?
- What Is A/B Testing?
- How Does A/B Testing Work?
- Why Do A/B Testing?
- Implementing A/B Testing in Next.js
- Prerequisites
- Performing A/B Testing in Next.js
- 1. Initializing a Next.js Project
- LandingPage1
- LandingPage2
- Hero1
- Hero2
- 2. Implementing the A/B Test Logic
- 3. Putting It All Together
- How DatoCMS Can Support Your A/B Testing Strategy
- Conclusion


