Next.js Ecommerce tutorial + template
How To Build an Ecommerce with Next.js and Snipcart
This is a tutorial to develop a Next.js ecommerce website, using Snipcart. It contains a template example that you can clone and an out-of-the-box installation.
Why a Next.js ecommerce?
Over the past few years, ecommerce websites have become increasingly popular, especially after the unfortunate events of the last years. Consequently, being able to build an ecommerce application from scratch is now more valuable than ever. Thankfully, several libraries and Next.js ecommerce templates have been released to help developers achieve this goal with less effort. In particular, Snipcart is the perfect solution to build a modern and secure ecommerce and start selling your products or services online.
TL;DR
Install this project on your DatoCMS account right away. This action will:
Clone a GitHub repo with a fully working example of a simple ecommerce, written in React and Typescript.
Copy our DatoCMS template project to your DatoCMS account.
Deploy on Vercel or Netlify your newly created ecommerce.
Otherwise, let's get started with the Next.js ecommerce tutorial !
What is Next.js
Next.js is a JavaScript framework built on top of Node.js. Its goal is to make web applications developed in React server-side rendered. In other words, it allows you to develop statically generated websites while using React.
This also makes you avoid the SEO problems coming with client-side rendered websites. So, not only will your Next.js applications be SEO-oriented, but also be loaded faster by the browser. This is because it can simply show the pages received by the server, without having to build them dynamically like in React.
Plus, its strength comes from the millions of ready-to-use npm libraries supported. These allow you to achieve any goal quicker, without having to reinvent the wheel. Consequently, Next.js is also a cost and time-effective solution.
If you want to achieve the same result but using React instead of Next.js, try reading this article!
What is Snipcart
Snipcart is a powerful, reliable, easy-to-install HTML and JavaScript shopping cart platform. You can this powerful tool to add the most common e-commerce features to any website or web application in minutes. It also allows you to customize its look & feel by using CSS custom rules. Plus, Snipcart comes with a complete and easy-to-use back-office management dashboard where you can track any kind of data related to your sales. In other terms, it represents the ideal JavaScript solution to add a shopping cart to your website effortlessly.
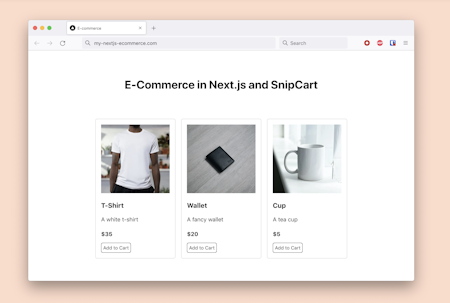
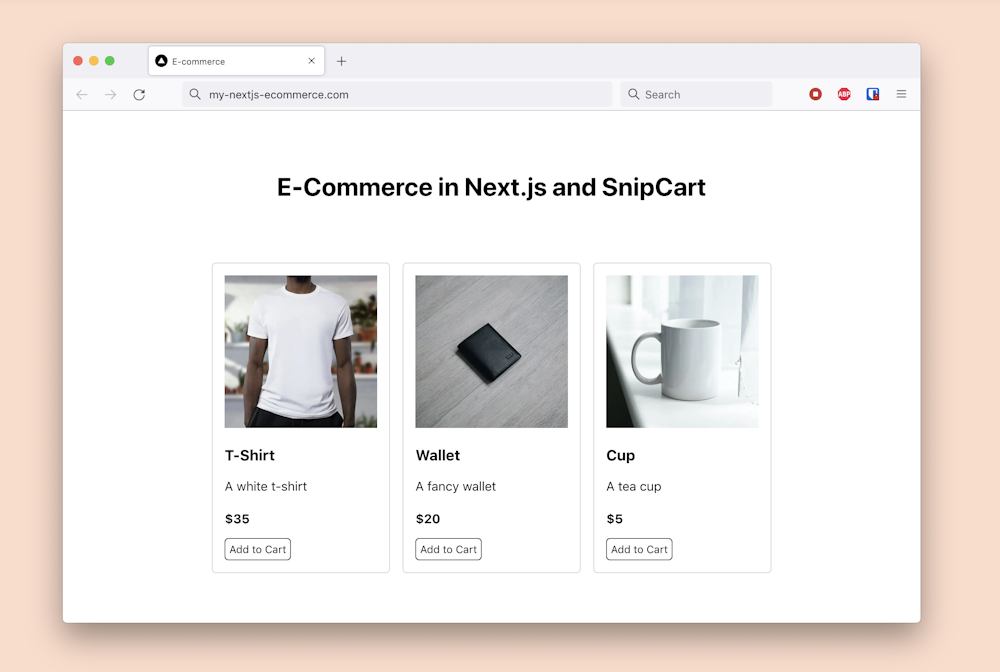
This is what the ecommerce Next.js template will look like:
Prerequisites
This is the list of all the prerequisites required to build the template application:
Node.js 12+ and npm 5.2+ and higher
Snipcart >= v3.2.0
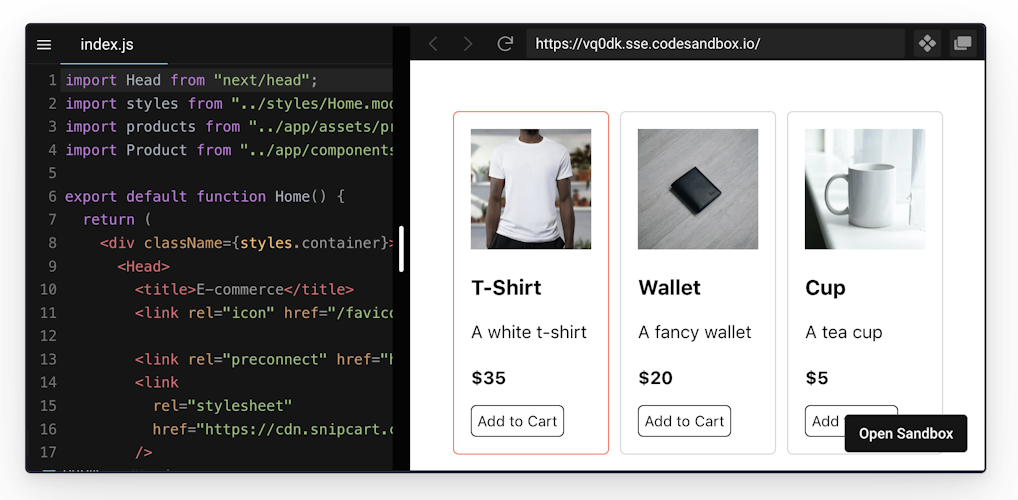
Follow this step-by-step tutorial to learn how to achieve the following result:
Developing a Next.js Ecommerce
Clone the GitHub repository supporting the article and try the template ecommerce you are about to see how to build by launching the following commands:
git clone https://github.com/Tonel/ecommerce-demo-nextjs-snipcartcd ecommerce-demo-nextjs-snipcartnpm inpm start
Or build the ecommerce application in Next.js by following this step-by-step tutorial.
1. Creating a Blank Next.js Ecommerce Project
Create Next App is the perfect tool to initialize a blank working project in Next.js with just one command. This is not complex and represents the officially supported way to create a Next.js empty application. Launch the following command to initialize your ecommerce Next.js new project:
npx create-next-app ecommerce-demo-nextjs-snipcart
Now, you should be able to see your project in the ecommerce Next.js template folder. This should have the following file structure:
ecommerce-demo-nextjs-snipcart├── README.md├── node_modules├── package.json├── .gitignore├── .eslintrc.json├── next.config.js├── public│ ├── favicon.ico│ ├── vercel.svg├── syles│ ├── globals.css│ ├── Home.module.css└── pages ├── _app.js ├── index.js ├── api ├── hello.jsAccess the ecommerce Next.js template folder and launch the local server by running these two commands:
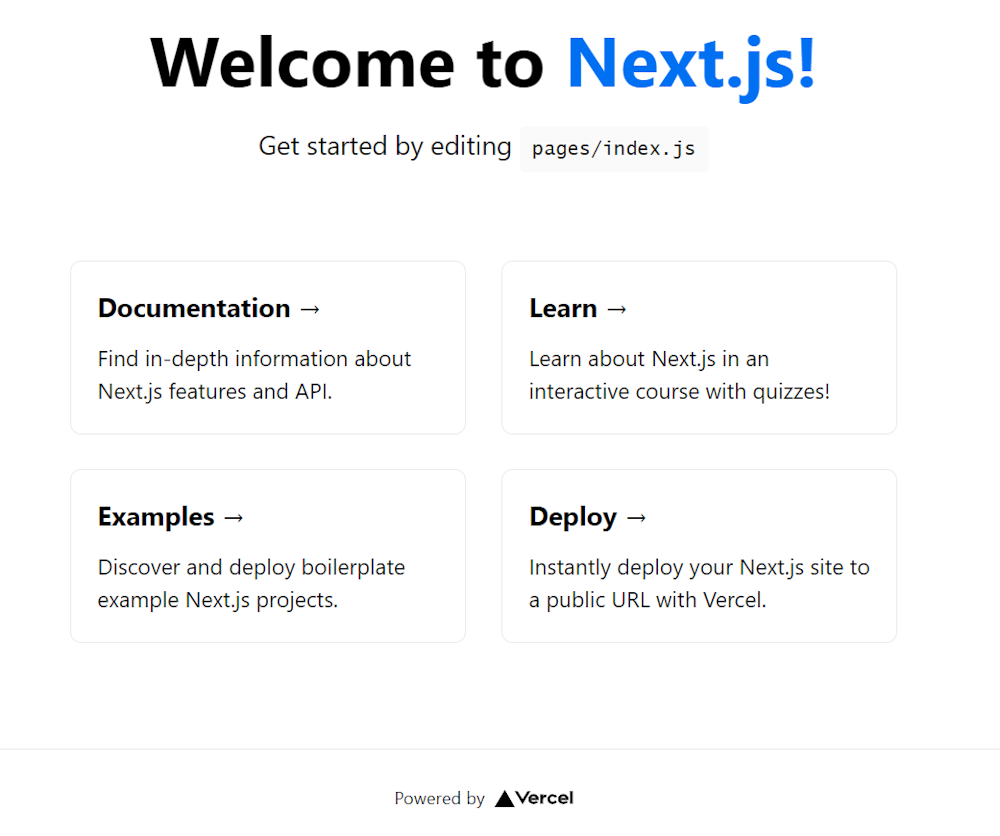
cd ecommerce-demo-nextjs-snipcartnpm run devThen, visit http://localhost:3000/ in your browser, and you will now be able to see the default Create Next App home page, as follows:
2. Integrating Snipcart with Next.js
Now, it is time to see how you can integrate Snipcart in your project. First, you need to subscribe to Snipcart. If you do not have an account, you can create a new one for free here. Otherwise, sign in here.
Second, you have to add Snipcart to your website. This can be achieved by importing its JavaScript and CSS files by using public CDN links. In detail, add the following lines between the <Head> component you can find in your pages/index.js file.
<link rel="preconnect" href="https://app.Snipcart.com" /><link rel="preconnect" href="https://cdn.Snipcart.com" /><link rel="stylesheet" href="https://cdn.Snipcart.com/themes/v3.2.1/default/Snipcart.css"/>
This is the Next.js way to add additional scripts to a page, which is the home in this case. Specifically, the first two lines are required to tell the browser to pre-connect to all the two Snipcart subdomains to improve performance. Then, the Snipcart CSS file containing everything required to style the default Snipcart shopping cart is imported.
Third, it is time to add the Snipcart JavaScript dependency to your ecommerce website. You can achieve this by pasting the following line of codes after the <footer> section of your pages/index.js file:
<script src="https://cdn.Snipcart.com/themes/v3.2.1/default/Snipcart.js" async/><div id="Snipcart" data-api-key="YOUR_SNIPCART_API_KEY" hidden></div>
Now, the Snipcart script providing the shopping cart features has just been imported. Also, a hidden <div> that will be used by Snipcart to show the shopping cart was defined. Keep in mind that in order to work, Snipcart requires you to specify your API key here. You can retrieve this information in your Snipcart account by logging in, opening the setting menu, and clicking on “API KEYS” as in the picture below:
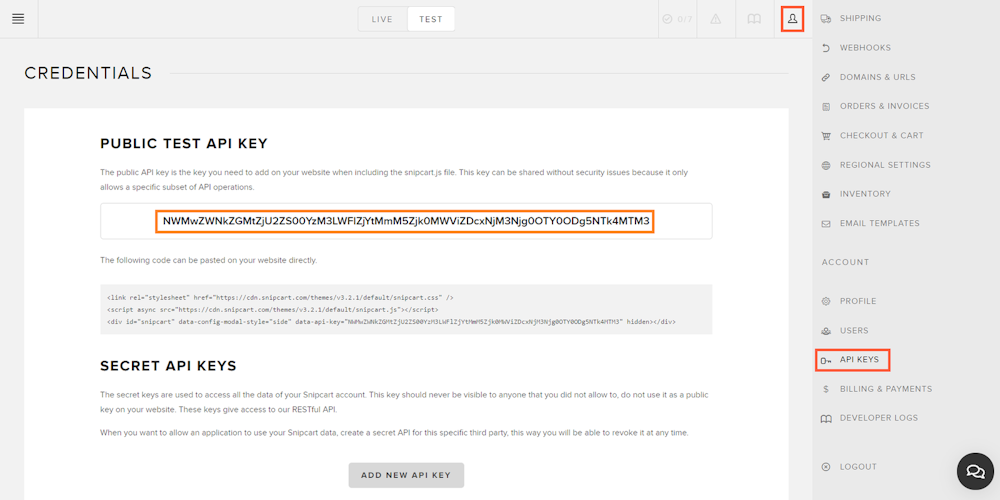
Replace “YOUR_SNIPCART_API_KEY” with that value, as follows:
<div id="Snipcart" data-api-key="NWMwZWNkZGMtZjU2ZS00YzM3LWFlZjYtMmM5Zjk0MWViZDcxNjM3Njg0OTY0ODg5NTk4MTM3" hidden></div>
If you encounter problems in setting up Snipcart or adding it to your website, follow this link from the official documentation.
3. Building a Product Component
Let’s now see how to implement a Product component and connect it to Snipcart. This can easily be achieved as follows:
export default function Product(props) { const { id, imageUrl, name, description, price } = props;
return ( <div key={id} className={styles.product}> <Image src={imageUrl} alt={`Image of ${name}`} height={640} width={640} /> <h3>{name}</h3> <p>{description}</p> <span>${price}</span> <div> <button className="Snipcart-add-item" data-item-id={id} data-item-image={imageUrl} data-item-name={name} data-item-url="/" data-item-price={price} > Add to Cart </button> </div> </div> );}What is important are the fields defined in the “Add to Cart” HTML <button> element. These attributes are required by Snipcart to be able to add your products to your shopping cart. So, they represent everything you need to take into consideration while integrating your products to the Snipcart shopping cart. Follow this link to learn more on how such an integration works.
As you can see, your products need to have at least an id, a name, an image, and a price. Such a component integrated with Snipcart is all that is needed to implement an ecommerce, as you are about to see.
4. Putting It All Together
You now are ready to see the entire ecommerce application in action. The only thing you need to do is to retrieve all your products. Then, show them on your home page by employing the Product component as below:
import Head from "next/head";import styles from "../styles/Home.module.css";import products from "../app/assets/products.json";import Product from "../app/components/Product/Product";
export default function Home() { return ( <div className={styles.container}> <Head> <title>E-commerce</title> <link rel="icon" href="/favicon.ico" />
<link rel="preconnect" href="https://cdn.Snipcart.com" /> <link rel="stylesheet" href="https://cdn.Snipcart.com/themes/v3.2.1/default/Snipcart.css" /> <script src="https://cdn.Snipcart.com/themes/v3.2.1/default/Snipcart.js" async /> </Head>
<main className={styles.main}> <h1>E-Commerce in Next.js and Snipcart</h1>
<div className={styles.grid}> {products.map((product, i) => ( <Product {...product} key={i} /> ))} </div> </main>
<div id="Snipcart" data-api-key="NWMwZWNkZGMtZjU2ZS00YzM3LWFlZjYtMmM5Zjk0MWViZDcxNjM3Njg0OTY0ODg5NTk4MTM3" hidden /> </div> );}
By clicking on the “Add to Cart” button your products will be automatically added to the Snipcart shopping cart. This way, users will be able to add to their cart the products or services they are interested to buy.
The last thing required is integrating a payment system. Precisely, you can connect one of the several payment gateways supported by Snipcart and allow users to pay and receive their products.
Et voilà, your ecommerce website has just been implemented!
On the other hand, the entire ecommerce website relies on the products.json file containing all product information for sale.
[ { "id": "t-shirt", "name": "T-Shirt", "price": 35.00, "imageUrl": "https://source.unsplash.com/WWesmHEgXDs/640x640", "description": "A white t-shirt", "url": "/api/products/halfmoon" }, { "id": "wallet", "name": "Wallet", "price": 20.00, "imageUrl": "https://source.unsplash.com/9Huby3g9fN0/640x640", "description": "A fancy wallet", "url": "/api/products/wallet" }, { "id": "cup", "name": "Cup", "price": 5.00, "imageUrl": "https://source.unsplash.com/he_xuL-CyyI/640x640", "description": "A tea cup", "url": "/api/products/veiltail" }]
As you can imagine, keeping all your products in such a file is not scalable, and why most companies now-a-days rely on a headless CMS to write and store products data.
Content Management Made Easy with DatoCMS
DatoCMS is one of the best choices when it comes to building an ecommerce. It doesn’t only provide a performant API (GraphQL and REST) to get your products' data in a matter of milliseconds, but a super user-friendly interface. By connecting your ecommerce website to DatoCMS, you will be able to tackle the content management issue aforementioned.
In fact, you will be able to retrieve all your products as effortlessly defined by your content generation team. The advantage of DatoCMS in relation to its competitors, is the possibility to add validations to your data. In this way, you can always be sure that what gets online is vetted and safe.
To get started with DatoCMS and Next.js, start from our Next.js CMS page, or follow this link from the official documentation. This is just one of the many features that DatoCMS offers when it comes to building an ecommerce. Find them all in our article on multi-site headless CMS.
Get started with just a few clicks by installing our out-of-the-box template

Next.js Ecommerce with Snipcart and DatoCMS - Conclusion
In this article, we looked at how to build an ecommerce website in Next.js. Being able to develop an ecommerce has become increasingly important. At the same time, many libraries have been developed to make this simpler, and you do not have to start from scratch.
Particularly, Snipcart is the perfect solution to achieve such a result effortlessly. Plus, it is easy to adopt with technologies like Next.js, as we just saw. But the real challenge lies in how to generate the content related to the products or services on sale. This is because anyone should be able to manage the content shown on an ecommerce.
Thankfully, you can avoid these problems by taking advantage of a complete and reliable headless CMS solution – such as DatoCMS.
Thanks for reading! We hope that you found this article helpful. Feel free to reach out to us on Twitter with any questions, comments, or suggestions.
- Why a Next.js ecommerce?
- TL;DR
- What is Next.js
- What is Snipcart
- Prerequisites
- Developing a Next.js Ecommerce
- 1. Creating a Blank Next.js Ecommerce Project
- 2. Integrating Snipcart with Next.js
- 3. Building a Product Component
- 4. Putting It All Together
- Content Management Made Easy with DatoCMS
- Next.js Ecommerce with Snipcart and DatoCMS - Conclusion


