Azure Blob Storage Enterprise integration
Use an Azure Blob Storage container of your choice to store all the assets you upload to your DatoCMS project


DatoCMS allows you to use your own Azure and Imgix accounts to store your project assets. This allows to be in total control of your data, and to offer a custom CDN domain for your assets — which, by default is www.datocms-assets.com for every project.
How to activate a custom Azure Blob Storage for your DatoCMS project
To store your DatoCMS assets in a custom Azure Blob Storage container please follow these steps:
Create a new container
Inside your Microsoft Azure dashboard:
Enter the Storage accounts service
Select the storage account where you want to create a new container (or create a new one)
Enter the Data Storage > Containers section
Create a new container


Enable CORS on storage account
Inside your Microsoft Azure dashboard:
Enter the Storage accounts service
Select the storage account where you want to create a new container
Enter the Settings > Resource sharing (CORS) section
Add the following settings, then press Save:
Allowed origins:
*Allowed methods:
PUTAllowed headers:
content-type,x-ms-blob-type


Create a new Application
Inside your Microsoft Azure dashboard:
Enter the Microsoft Entra ID service
Enter the Manage > App Registrations section
Press the New registration button
Give a name to the new application (ie. DatoCMS Custom Storage)
Press the Register button
Enter the Manage > Certificate & secrets section
Select the Client secrets tab
Press the New client secret button
Specify 730 days (24 months) in the Expires field
Press the Add button
Copy the Value of the secret


Now go back to the Overview section, and copy the Directory (tenant) ID and Application (client) ID:


Create a custom role
Inside your Microsoft Azure dashboard:
Enter the Storage accounts service
Select the storage account where you want to create a new container
Enter the Access Control (IAM) section
Select the Roles tab
Search the "Storage Blob Data Reader" role, and select Clone


Inside the Create a custom role modal flow, edit the role to apply the following characteristics, making sure to replace the <ID>, <SUBSCRIPTION_ID> and <STORAGE_ACCOUNT_ID> with the correct values:
{"id": "<ID>","properties": {"roleName": "Storage Blob Data Reader and Writer","description": "","assignableScopes": ["/subscriptions/<SUBSCRIPTION_ID>/resourceGroups/DatoCMS-Integration-Test/providers/Microsoft.Storage/storageAccounts/<STORAGE_ACCOUNT_ID>"],"permissions": [{"actions": ["Microsoft.Storage/storageAccounts/blobServices/generateUserDelegationKey/action"],"notActions": [],"dataActions": ["Microsoft.Storage/storageAccounts/blobServices/containers/blobs/read","Microsoft.Storage/storageAccounts/blobServices/containers/blobs/write"],"notDataActions": []}]}}
Assign the role to the application
Inside your Microsoft Azure dashboard:
Enter the Storage accounts service
Select the storage account where you want to create a new container
Enter the Access Control (IAM) section
Select Add > Add role assignment
Under the Role tab, select the newly created Storage Blob Data Reader and Writer role
Select Next
Under the Members tab, press Select members, and choose the DatoCMS Custom Storage application
Under the Conditions tab, press Add condition
Under Editor type, select Code
Now inside the code editor, paste the following code, making sure to replace <CONTAINER_NAME> with the name of your container:
((!(ActionMatches{'Microsoft.Storage/storageAccounts/blobServices/containers/blobs/read'})AND!(ActionMatches{'Microsoft.Storage/storageAccounts/blobServices/containers/blobs/write'}))OR(@Resource[Microsoft.Storage/storageAccounts/blobServices/containers:name] StringEquals '<CONTAINER_NAME>')
Select Save, then Review + assign.
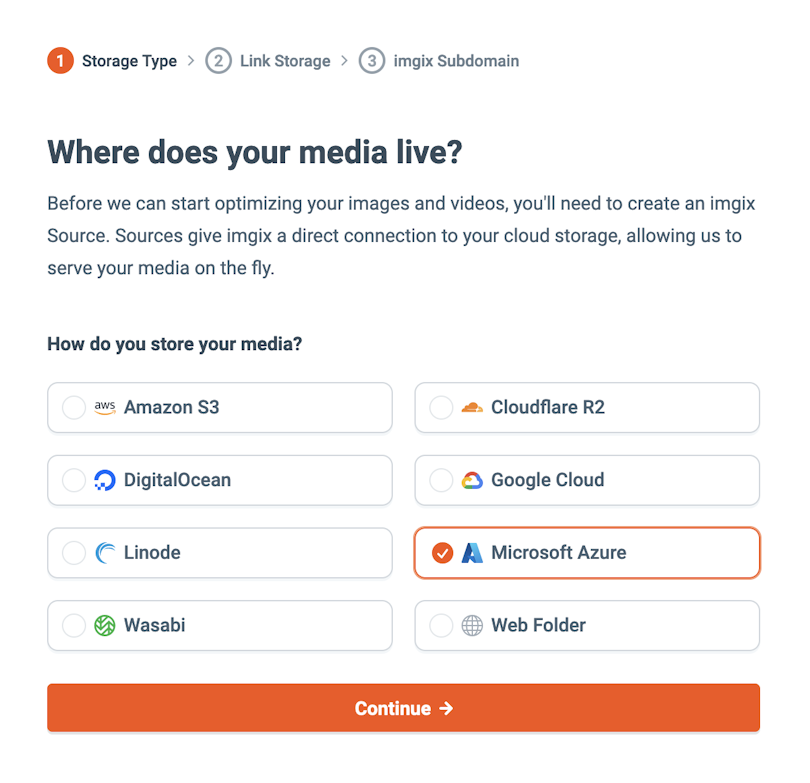
Create an Imgix source
Go to Imgix and create a new account. Create a new source, and link it to the Azure container you just created.

Adding a custom domain
If you're not satisfied with the default Imgix subdomain (ie. https://your-source.imgix.net) you can add a custom domain to the Imgix source, then configure your domain DNS settings so that its CNAME record points to your-source.imgix.net:


Enable HTTPS for the Imgix source
DatoCMS requires HTTPS for custom domains. There are two different ways you can enable it. The first one is to request an HTTP certificate to Imgix. From the Imgix documentation:
By default, you will only be able to use the custom subdomain with http. Using https requires an SSL certificate through our CDN partner and incurs additional fees—please contact Imgix Support to set this up.
Alternatively, to get HTTPS for free, you can use Cloudflare on top of Imgix. This is a cheaper alternative, but requires changing your original domain nameservers to the Cloudflare nameservers, which is something you might not want, and might have some impacts in the way assets are returned.
Send request for custom uploads to DatoCMS support
Once everything is ready, send an email to support@datocms.com and request the change. These are the information we'll ask you for:
The name of your Azure Storage Account
The name of your Container
The Directory (tenant) ID, Application (client) ID and Client Secret Value of your Azure Application
The Imgix domain (ie.
your-source.imgix.netorassets.superduper.com)
Together we'll schedule a maintenance window where we'll transfer every assets already uploaded to your Project to the new Azure container, and enable the custom domain.
From then on all new assets you upload will be stored in your Azure Blob Storage container, and will be available from your custom Imgix domain.
 DatoCMS